Introduction
Targeted Messaging is used to send e-mails to targeted groups of people at SUNY Cortland.
Access
To get started using Targeted Messaging you must first request access. To request, use the red Request Campus Communicator Access button on this page, and under Request Access For check the box for Targeted Announcements
Once access has been granted, log into MyRedDragon, selecting the Faculty/Staff tab and then the Launch Targeted Messaging 2.3 link found in the Targeted Messaging channel.
Overview
In this documentation we will review:
- Creating a filter
- Saving a filter
- Writing your email
- Sending
Creating a Filter
Select the target population:
The target populations are Students, Employees, EOP Instructors and Outstanding Student Financial Aid Requests.
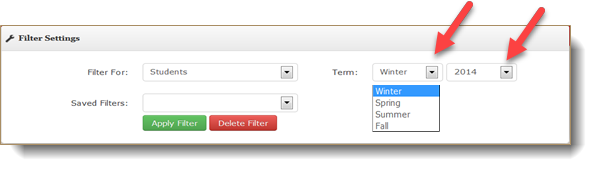
Several of the populations depend on a selected Term. If the population depends on a Term, in the Filter Settings box, the Term category will default to the present term. If you will be searching for information from a different term, be sure to change the Term selection. Select the correct term using the arrows to drop the available selections down. Choose the semester or year needed.
If a population does not depend on a Term, then the Term drop-down lists will be disabled.
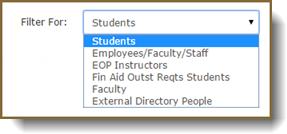
Next, select the target population you will be mailing to. Click the arrow in the Filter For category to drop down the list of options for the target population. The options are Students, Employees/Faculty/Staff, EOP Instructors, Outstanding Student Financial Aid Requests, Faculty and External Directory People. As Students is the most used population, it is the default setting. Click on and highlight the population to select it.
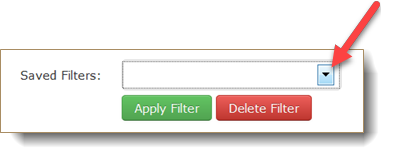
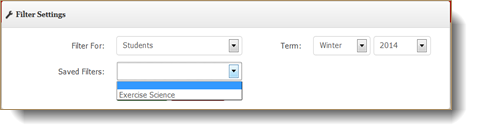
If you want to use an already saved filter, in the Saved Filters section, click the arrow for a drop-down list of the available filters. Select the filter you want to use from the list and click the Apply Filter button.
 The Saved Filters drop-down will be empty until you create filters and save them.
The Student and Employee populations allow you to send to the entire population with no additional filters, while the others must have at least one filter before you can send a message.
Build the filter:
The Filter section will be populated according to the target population chosen in the Filter For category above.
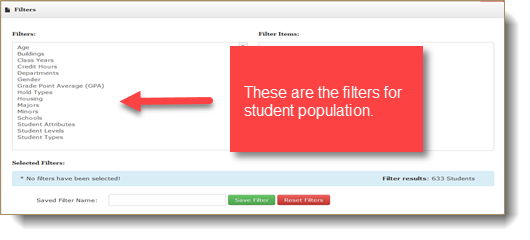
The filters for the Student target population are Age, Buildings, Class Years, Credit Hours, Departments, Gender, Grade Point Average (GPA), Hold Types, Housing, Majors, Minors, Schools, Student Attributes, Student Levels and Student types. (as shown above)
The Employees/Faculty/Staff target population can only be filtered by Departments. The EOP Instructors target Population can only be filtered by EOP Students and the Outstanding Student Financial Aid Requests target population can only be filtered by Aid Year. The Faculty target population can be filtered for Buildings and External Directory People can be filtered by External Sources. Additional filters for these populations can be requested if they become necessary.
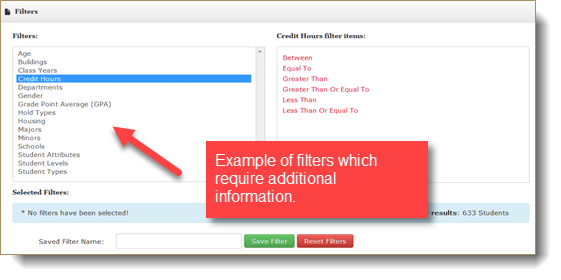
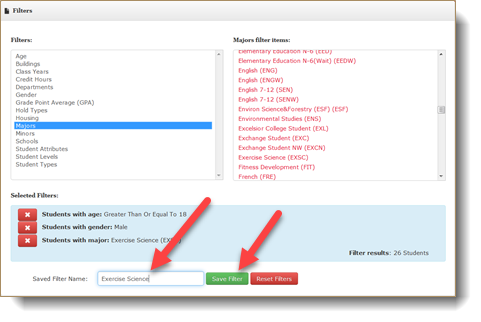
There are two types of filters, those which generate a pick list in the filter items section (Fig.1) and those which require additional input (Fig.2), such as Greater Than, Equal to or Less Than. Most filters generate a list, in the Student filters only Age, Credit Hours and Grade Point Average require you to enter more information.
Fig.1
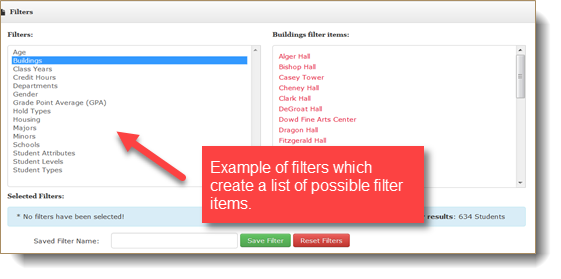
Fig.2
To select a filter, click on the name in the Filter category. The Filter Items section will populate with the choices available for the filter. Choose one Filter Item.
You can select many filters, but each filter can have only one filter item.
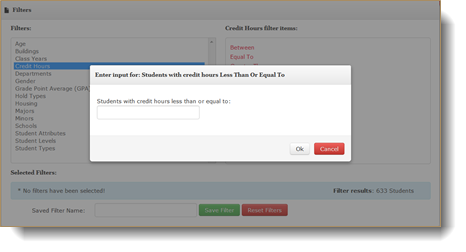
If the Filter Item you select requires more input, a pop up box will appear, with space for you to enter the required information.
After selecting Filters and their Filter Items the selected filters will be shown in the Selected Filters box. The Filter Result will show how many people are in the filtered population.
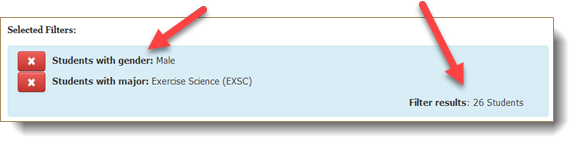
To change the filter item of a filter (in the above example change Students with Majors: Exercise Science to Students with Majors: Art) select the filter and the new filter item. The previous one will be replaced.
To remove a filter, select the red X button next to the filter you want to remove.
To remove all the filters that have been selected, click the Reset Filters button.
Saving a Filter
After all criteria have been chosen, if the filter is going to be used on a recurring basis it can be saved. First, enter a name for the filter in the Saved Filter Name box and then click the Save Filter button.
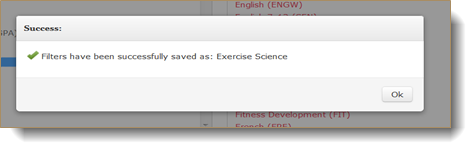
You will receive a pop-up message stating that the filter has been saved.
The saved filter will now be available in the Saved Filters drop-down in the Filter Settings section.
Your Message
Writing your email
Creating a message in Targeted Messaging is as easy as sending as e-mail. The email can be written in Targeted Messaging or it can be imported from MSWord.
Each message is composed of a subject, body and an optional attachment.
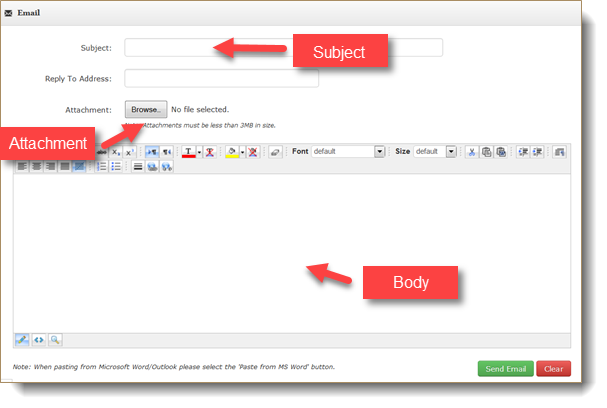
Enter the subject of the e-mail in the Subject line and a reply address in the Reply to Address space. If the Reply space is left blank, the return address for the e-mail will be mrd@cortland.edu.
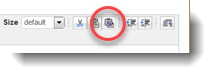
The message can be written directly in the space provided using the text editor buttons to change the look of the message. Pictures can be inserted into the message provided that they are stored on the web. You would not be able to insert an image that is stored on your desktop unless you were to upload this image to the web and use its web address.
To copy and paste your message from Word:
- Select the text in Word
- In Targeted Messaging select the Paste from MSWord button
- Paste the text.
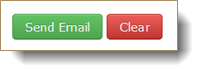
When you are satisfied with your message click Send Email to send. If you would like to re-do your message select Clear to clear all the e-mail fields.
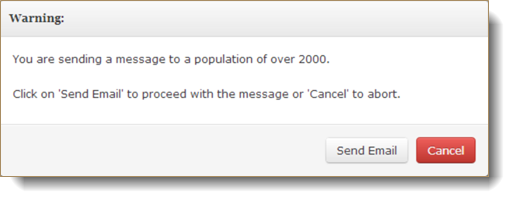
If the message is going to be sent to a target population of more than 2000 people you will receive a message asking if this is correct. This is not an error message it is just a check to make sure that your intention is to send to a very large population. To continue, click Send Email; to cancel the message click Cancel. If you click Cancel, you will return to the message and can make corrections if necessary.
After the Send Email button is pressed, your message will be put into a queue and a receipt email will be sent to your Cortland email account. The queue sends emails in batches of 250-500 emails every 5 minutes. So, if you are sending a large amount of emails it may take some time to send the message to all intended recipients.
Message Status
You can view the status of all your messages in your Messages Sent section.
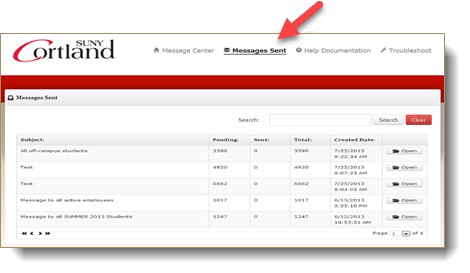
The Pending column shows the number of messages that are still in the queue waiting to be emailed. The Sent column shows the number of emails that have been successfully emailed to the recipients. To view more details about a particular message you can click on the Open button. Message details will be displayed, including the filters used to send the message, the message body itself, and the list of recipients.
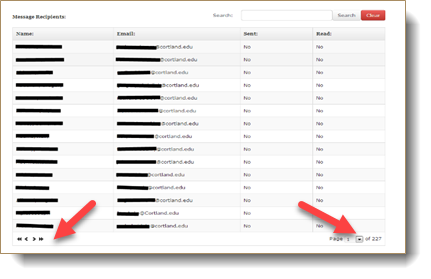
Message recipients are displayed 15 results at a time. The list can be navigated using the controls at the bottom of the page.
The Sent column shows whether a message has been sent already and the Read column indicates whether the message has been opened. The ‘Read’ functionality is not entirely accurate as it depends on settings on the recipient’s computers.