Use a simple table structure, and specify column header information
Screen readers keep track of their location in a table by counting table cells. If a table is nested within another table or if a cell is merged or split, the screen reader loses count and can’t provide helpful information about the table after that point. Blank cells in a table could also mislead someone using a screen reader into thinking that there is nothing more in the table.
Screen readers also use header information to identify rows and columns.
In Word:
- Position the cursor anywhere in a table.
- On the Table Tools Design tab, in the Table Style Options group, select the Header Row check box.
- Insert column headings.

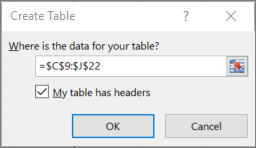
In Excel:
Transform data into a table
- Enter the data that will become part of the table.
- Select any cell within the data, and then select Insert > Table.
- Make sure the highlighted cells or range reference is correct.
- Make sure the My table has headers check box is selected, and select OK.
Add a descriptive table name
- Select anywhere in the table.
- Under Design > Table Name, replace the generic name with a more meaningful one.
Apply an accessible design
- Select anywhere in the table, and then go to Design.
- Select the design features you want, for example, Header Row, Banded Rows, and First Column.
- To show all available table styles, select More.
- From the Medium styles, select a style with strong contrasting colors.

Increase the font size
- Select the entire table.
- Go to Home > Font Size, and select a font size of 12 points or larger.
Increase space between rows
- Select the entire table.
- Select Home > Format > Row Height.
- Increase the row height to, for example, 30 or 40, and then select OK.
Adjust the column width to fit the text
- Select the entire table.
- Select Home > Format > AutoFit Column Width.
The width of the selected columns adjusts to fit the longest text in each column.
Left-align text
- Select the cells, columns, or rows that you want to align.
- Select Home > Left
 .
.